How to Create a Separate Page for Blog Posts in WordPress
Are you trying to create a separate page for blog posts in WordPress?
The blog post is very important to connect with the audience. Besides, you can describe your services and offers through blog posts. You can also share tutorials about your products using the blog post too. WordPress will display your blog posts on your homepage by default. But if you want to be regular in blog posts then you need to have a separate blog post page.
So here in this article, we will show you the easiest way to create a separate blog post page for your website.
Create a Separate Page for Blog Posts in WordPress
You can customize your WordPress website to create a custom homepage. WordPress offers you these features and you can also create a page as your blog posts page. So at first, you need to create two different pages. The first one is for your homepage and the other one is for the blog post page.
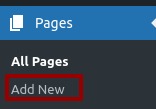
To create pages login to your WordPress dashboard and then go to Pages > Add new.
After creating the page publish it and go to Settings > Reading. Now here on this page check the static page option from the homepage display option. From the homepage and post page drop-down menu choose the page you just created. Choose homepage on the homepage menu and blog posts on the post page menu.
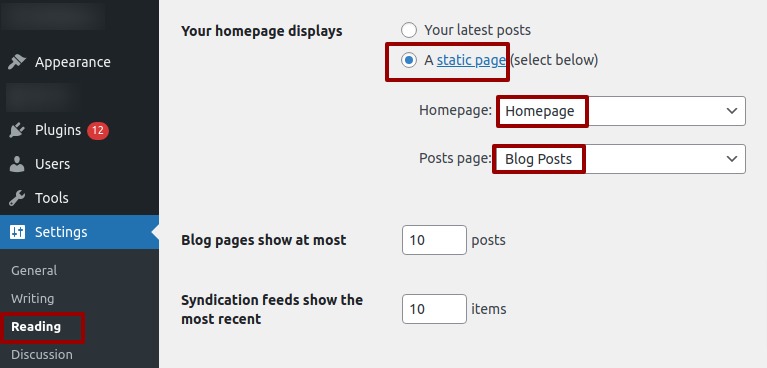
Don’t forget to click on the save changes button. Now, these pages will be set as your homepage and posts page. It will display on your website based on the theme you are using. You can customize the theme settings from the customization option.
You can see this article to know how to customize themes using the theme customization options.
Add blog page link to navigation menu
You have created a separate blog post page for your website. Now you need to make it visible to the users. You need to add the blog page link to your website in a way that users can easily find it. The best way to add your blog page link is to add the link in the navigation menu.
To add the blog page in the navigation menu again go to your WordPress dashboard and then Appearance > Menus. Now from the select a menu to edit option select the main menu. From the pages option of the left column select the blog post page and then click on the add to menu button.
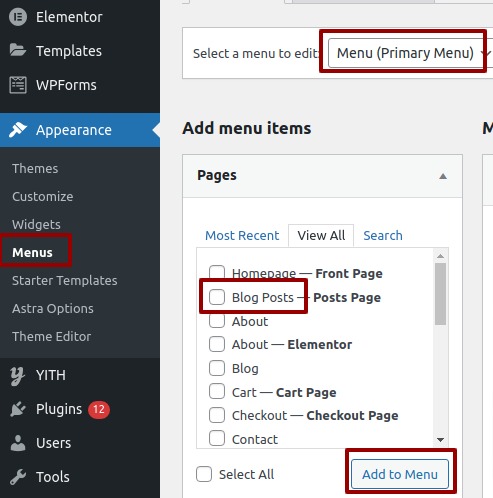
The blog post page will add to the main menu list. You can reorder the list if you want and then click on the save menu option.
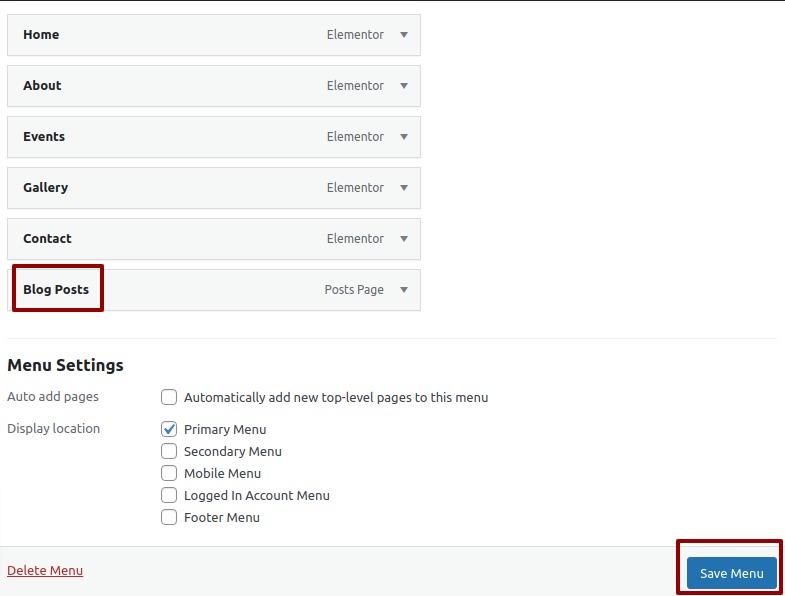
It will add the menu to your navigation menu. You can go to your website and see the blog post in your navigation menu.

Customize the blog posts page
When you add the blog post page WordPress will search for the blog page template in your theme. If there is any blog page template available for the theme you are using it will add it as your blog page. But if there is no template available WordPress default page will show up on your blog posts page.
You can also change the layout of your blog posts pages and edit the content using the Elementor page builder plugins. With the Elementor plugin, you can easily redesign your website pages. First, install the plugin and activate it and then open the blog posts page with Elementor.

Now you can see the edit option just click on the folder icon to add a pre-built template.

It will open the Elementor template library and then search for blog posts. Then you can select any blog pages and insert them into your blog posts page.
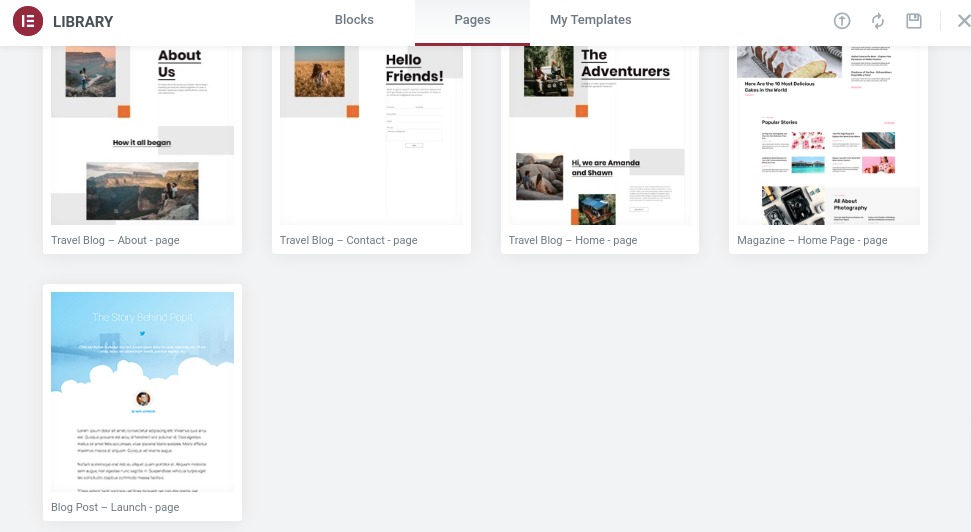
Now you can easily replace the content and images based on your website. You can see this article to learn how to create page with Elementor using pre-built template
You can also follow the same way to edit the homepage of your website. This is how can create a separate page for blog posts on the WordPress website.
We hope this article will help you to create a separate blog posts page for your website. If you like the article please follow our Facebook page to stay connected.


